
Learning how to germinate seeds can give your flower or vegetable garden an advantage and save you money. Starting seeds indoors is easy with the right amount of moisture and heat. As the seedlings emerge, ensure they have a bright light source and a warm area to continue growing. In no time, you’ll have plants ready to transfer to the garden or a container. Learn all the essentials of germination and indoor seeding.
What Is Germination?
Germination begins when seeds absorb moisture, activating metabolic pathways stored in the seed and leading to plant growth. Dormant seeds require oxygen, water, and the proper temperature for germination. These conditions allow the seed coat to open, enabling the root to grow. Once the root is established, a new shoot containing the stem and leaves will emerge. This shoot needs sunlight for further growth.
What Types of Seeds Will Germinate Indoors?
Seeds can germinate indoors if you follow the proper guidelines for seed starting. Germinating seeds in a controlled environment, especially in colder climates, extends the growing season for plants. This is particularly beneficial for slow-growing plants like tomatoes, melons, and pumpkins, giving them time to mature before the first autumn frost.
You can also germinate fast-growing vegetables indoors. Start seeds for varieties like lettuce, Swiss chard, or radishes up to six weeks before the average frost date in your region to give them an early start in spring.
What Do Seeds Need?
Different seeds require different conditions for germination, so check the seed packets—they are full of useful details!
Temperature
Certain seeds, including many perennials, must be chilled before germinating and breaking dormancy. This cold period mimics winter, and when they are exposed to warmth, they recognize it as spring and begin to grow. Simply place them in the refrigerator for the appropriate time before planting. This process is called stratification.
Some seeds need extra heat. For example, tomatoes and peppers prefer soil temperatures around the 80s (Fahrenheit), while some perennials thrive in cooler temperatures in the lower 60s. Generally, 65 to 75°F (18-24°C) is ideal for most seeds.
Moisture
Another critical element for seed germination is water, which helps soften the seed’s protective coat. Just as we wear an outer layer for protection, a seed’s coat guards it against diseases, parasites, colds, and damage. When a seed absorbs water, it swells, splits, and speeds up germination.
Usually, maintaining soil moisture is sufficient for most seeds. However, some seeds require soaking a few hours before planting because their coats are tough. It is sometimes recommended to gently nick, file, or sand the seed coat to help it break down and accelerate germination. However, trying to cut small seeds can be challenging!
Personally, I often prefer soaking seeds over nicking. Soak many seeds—particularly beans, peas, morning glories, sweet peas, and other vines—to speed up sprouting. Ensure you soak seeds for 12-24 hours; soaking them too long can drown them. Soak seeds just before planting them.
Air
Surprisingly, seeds breathe. As they grow, their need for air increases. Hard-packed or waterlogged soil blocks airflow and can even stop germination. A loose, well-drained soil mix with added vermiculite or perlite is ideal for seeding, providing ample air pockets for seeds to access.
Light
Seeds are most likely to germinate in darkness. The depth at which they should be planted varies by seed type, so always check the seed packet or catalog. Generally, plant seeds at a depth of “2-3 times the width of the seed.”
Some seeds require light to germinate. Do not bury these seeds. Place them on the soil surface and press them down to ensure they contact the soil. If necessary, cover them lightly with vermiculite. Mist them gently to avoid displacement and place them where they can receive natural or artificial light.
After germination, seeds require less heat and plenty of sunlight. Seedlings thrive with 16 hours of light per day. (Darkness is also essential, as that’s when they do most of their growth.)
Steps to Germinating Seeds Indoors
For indoor seeding, make sure you select fresh seeds. Seeds that are older than 2 years may not be able to germinate. Also, read the seed packet carefully to ensure you have the best chances of success.
Certain flower or vegetable seeds may require precise temperatures, while others may need to be planted earlier in the season if they have a long germination period. Once you have a clear understanding of your germination requirements, follow these common steps:
- Prepare the soil mix for seeding
Commercially available seed starter kits, also called peat cups or seedling trays, can be used. Paper egg cartons filled with seed-starting medium or a growing mix can also be used. Any container you choose must have drainage holes.
- Plant the seeds in soil or a damp paper towel
Follow the directions on the seed packet for how deep to sow the seeds. The general rule is to plant seeds at a depth two times the size of the seed. Smaller vegetable seeds like tomatoes would be about one-eighth to one-fourth of an inch deep into the soil. You can lightly press the seeds beneath the soil surface instead of digging tiny holes.
Plant larger seeds, such as sunflower seeds, deeper into the soil. To ensure a soil-free and quicker germination process, place the seedlings on top of a damp towel and then place them inside plastic bags. This method will likely result in tiny sprouts within less than a week.
- Cover the seedlings with a lid or plastic bag
Cover the seedlings (whether in soil or on a paper towel) for a miniature DIY greenhouse) with a plastic bag, plastic wrap, or a clear plastic lid. Seed starter kits sold commercially typically come with a lid that can be placed over the tray of seedlings.
- Place the seedlings in a cool location
Check the seed packets to find each plant’s ideal soil temperature. Place the tray on a windowsill with sunlight or on the floor to maintain the temperature and lighting. Windows that face south are generally ideal. Avoid direct, hot sunlight, as it could harm the seeds.
The best results are usually obtained when seedlings are kept at temperatures between sixty and seventy degrees Fahrenheit. Consider using fluorescent lights or grow lights in colder climates to encourage healthy seedlings.
- Keep the potting mix damp
Seeds require heat and constant moisture to germinate. A spray bottle is a great way to ensure the soil remains humid. Be careful not to overwater or soak the seeds.
- Thin the seedlings to encourage larger plants
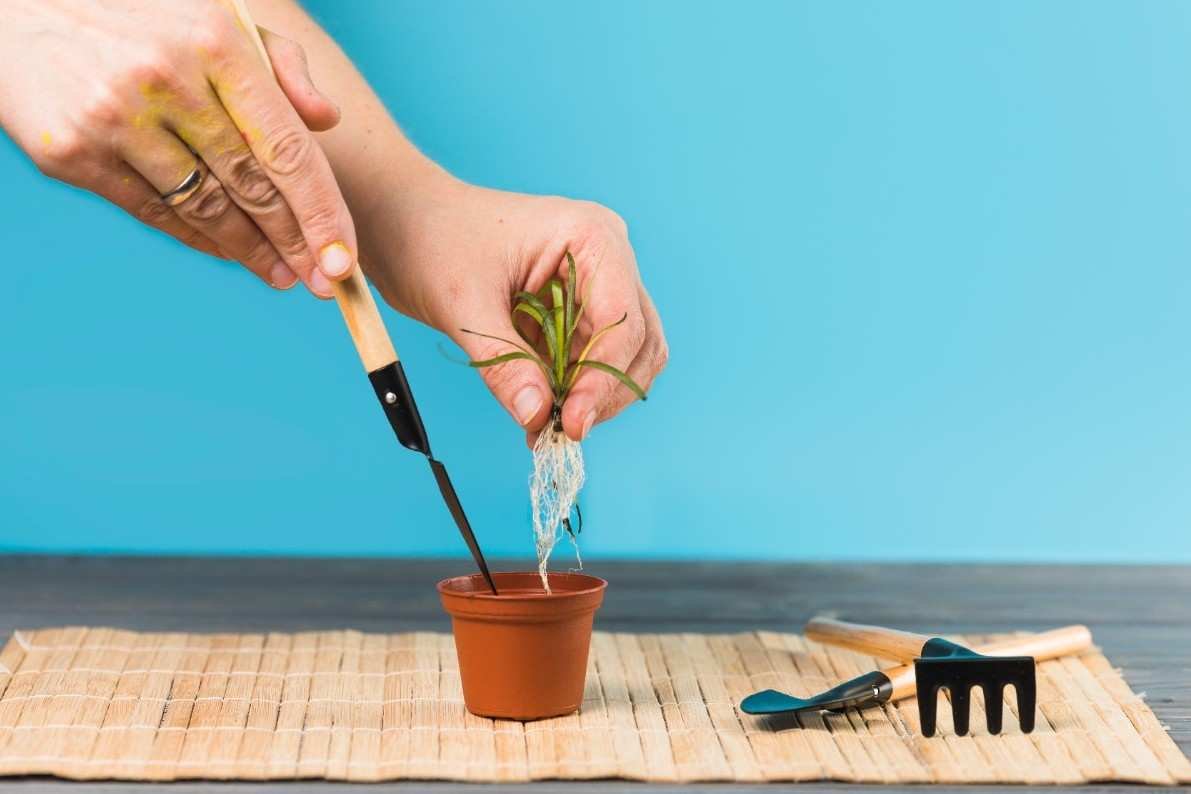
Once the seeds have sprouted and small root sprouts emerge from the paper towel, you can transfer the seeds into seedling kits or pots for potting. However, if you sow the seeds in the soil, focus on thinning the seedlings within each peat pot or cup when sprouts appear.
Use a pair of tweezers to remove two or three sprouts. Keep the healthiest and largest sprouts, and remove the rest. Keep the soil moist and allow for air circulation.
How to Germinate Seeds in Soil
Although using a paper towel to germinate seeds can be interesting and simple, it is usually not the most effective method of creating sturdy seedlings. Suppose the seeds remain in the paper towel for too long. In that case, hair-like roots can develop into the fibers of the paper towel and become damaged during transplantation, preventing the seeds from growing into sturdy seedlings.
The most efficient method of germinating seeds in the soil is to ensure they are in adequate contact with the seed-starting mix, have enough humidity, and are kept warm. Heating mats placed underneath the tray are a fantastic way to give the seeds an immediate start.
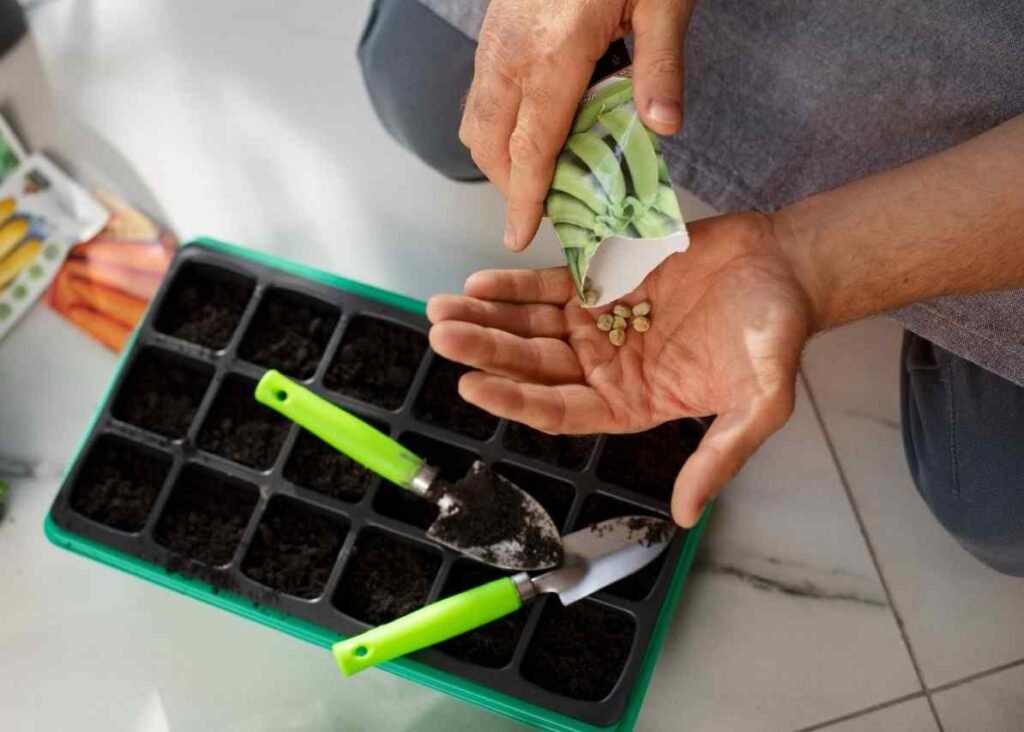
- Prepare the seed-starting medium and container. Select a commercial seed-starting mix and moisten it thoroughly. Fill the container up to 3/8 inches from the top. The mixture should be even and solid, without air pockets.
- Sow the seeds. If you’re using a tray with individual cells or containers, place two or three seeds in each container or cell. Plant seeds evenly in rows about two inches apart for a large, flat tray.
- Mark the seeds. This is particularly important if you’re sowing different varieties of seeds in a flat tray or seed-starting tray.
- Cover the seeds lightly with vermiculite or seed-starting mix twice the size of the seeds. Small seeds are typically left uncovered. Gently press the soil.
- Spray the surface with water. Use a spray or mister bottle filled with water to wet the surface of the tray or container gently.
- Cover the seeds. To create an artificial greenhouse, place a lid over the tray or cover it with plastic wrap or a plastic bag. The water is captured, and there is no need to water again until the seeds germinate.
- Keep the seeds in a warm place. For seed-starting, place the covered container in a warm location (65 to 75°F) or on a heated mat.
- Check for seedling emergence. When you see the first signs of green shoots sprouting, remove the lid or plastic cover and place the container in a sunny, south-facing window. The seedlings need a lot of light to thrive. Alternatively, you can use an indoor grow light.
- Maintain moisture levels. Let the seed-starting mix dry slightly between waterings, but don’t let the seedlings wilt. Avoid overwatering and ensure no water sits in the containers, as this can cause the seedlings to dampen and rot.
- Thin the seedlings. If all seeds have germinated and the seedlings are overcrowded, use garden snips to remove excess plants at the soil level. Most seedlings are best transplanted into smaller or individual containers once they have three leaves per stem.
What Seeds Should Not Be Started Indoors?
Vegetables
Certain plants grow quickly enough that starting seeds indoors is optional. Peas, beans, and corn, as well as leaf lettuce, spinach, melons, pumpkins, and squash, can all be directly sown in the garden or outside in a container.
Root crops don’t grow well in seed-starting trays. Sow carrot, radish, kohlrabi, beet, and turnip seeds directly. Seeded potatoes (potato eyes) are best planted directly in the garden or a container.
Flowers
Nasturtiums (Tropaeolum majus) and sunflowers (Helianthus annuus) don’t transplant well from a tray for seed-starting. If seeds germinate indoors, they must be planted in biodegradable containers that can be planted directly into the soil of your garden.
FAQ
What’s the best method to start germinating seeds?
If your seeds are covered with a tough seed coat, soak them in warm water for a few hours. Make sure the growing medium is evenly humid at all times. Ensure the temperature is high enough to allow the seeds to germinate. Use a heat mat when required. It is important to have a light source if the seeds require light to grow.
Do you prefer germinating seeds using soil rather than in paper towels?
The method of using paper towels creates ideal conditions for seedlings to sprout within a shorter period. Depending on the type of seeds, the controlled humidity and temperature conditions in the bag will allow seeds to germinate within just a couple of days. Your home or garden will burst with new leaves in a few days!
How do you germinate seeds indoors?
How to sow seeds indoors in just eight easy steps:
- Fill your seed tray, modular tray, or pot.
- Firm the compost gently.
- Plant your seeds.
- Cover the seeds.
- Water slowly.
- Label your trays and pots.
- Protect the seedlings.
- Place it in a warm, sun-filled area to grow.
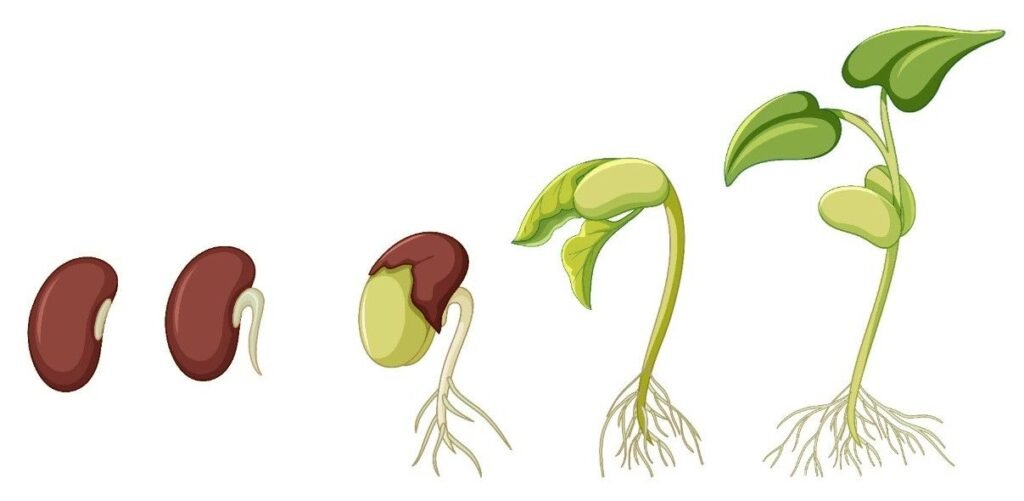
What are the five stages of seed germination?
The Seed Germination Process:
Step 1: Water fills the seed.
Step 2: The water activates enzymes that start the plant’s growth.
Step 3: The seed develops roots to access water underground.
Step 4: The seed sprouts shoots that spread toward the sun.
Step 5: Shoots develop leaves and begin photomorphogenesis.